
 AsyaTicari
 AsyaRestoran
 AsyaOtel
 AsyaCrm
 AsyaKlinik
 AsyaSpor
 AsyaSSH
 AsyaEmlak
 AsyaFilo
 AsyaPuantaj
 AsyaİSG
 AsyaİHD
 Kolay Öğren
AsyaRestoran · Selling
Table plan
Table status in the halls, opening bills, changing / merging tables and editing the plan layout.
The Table plan shows the tables in each hall and their status. Tap an empty table to open a bill, tap an occupied table to go to its bill. The screen refreshes itself every few seconds.
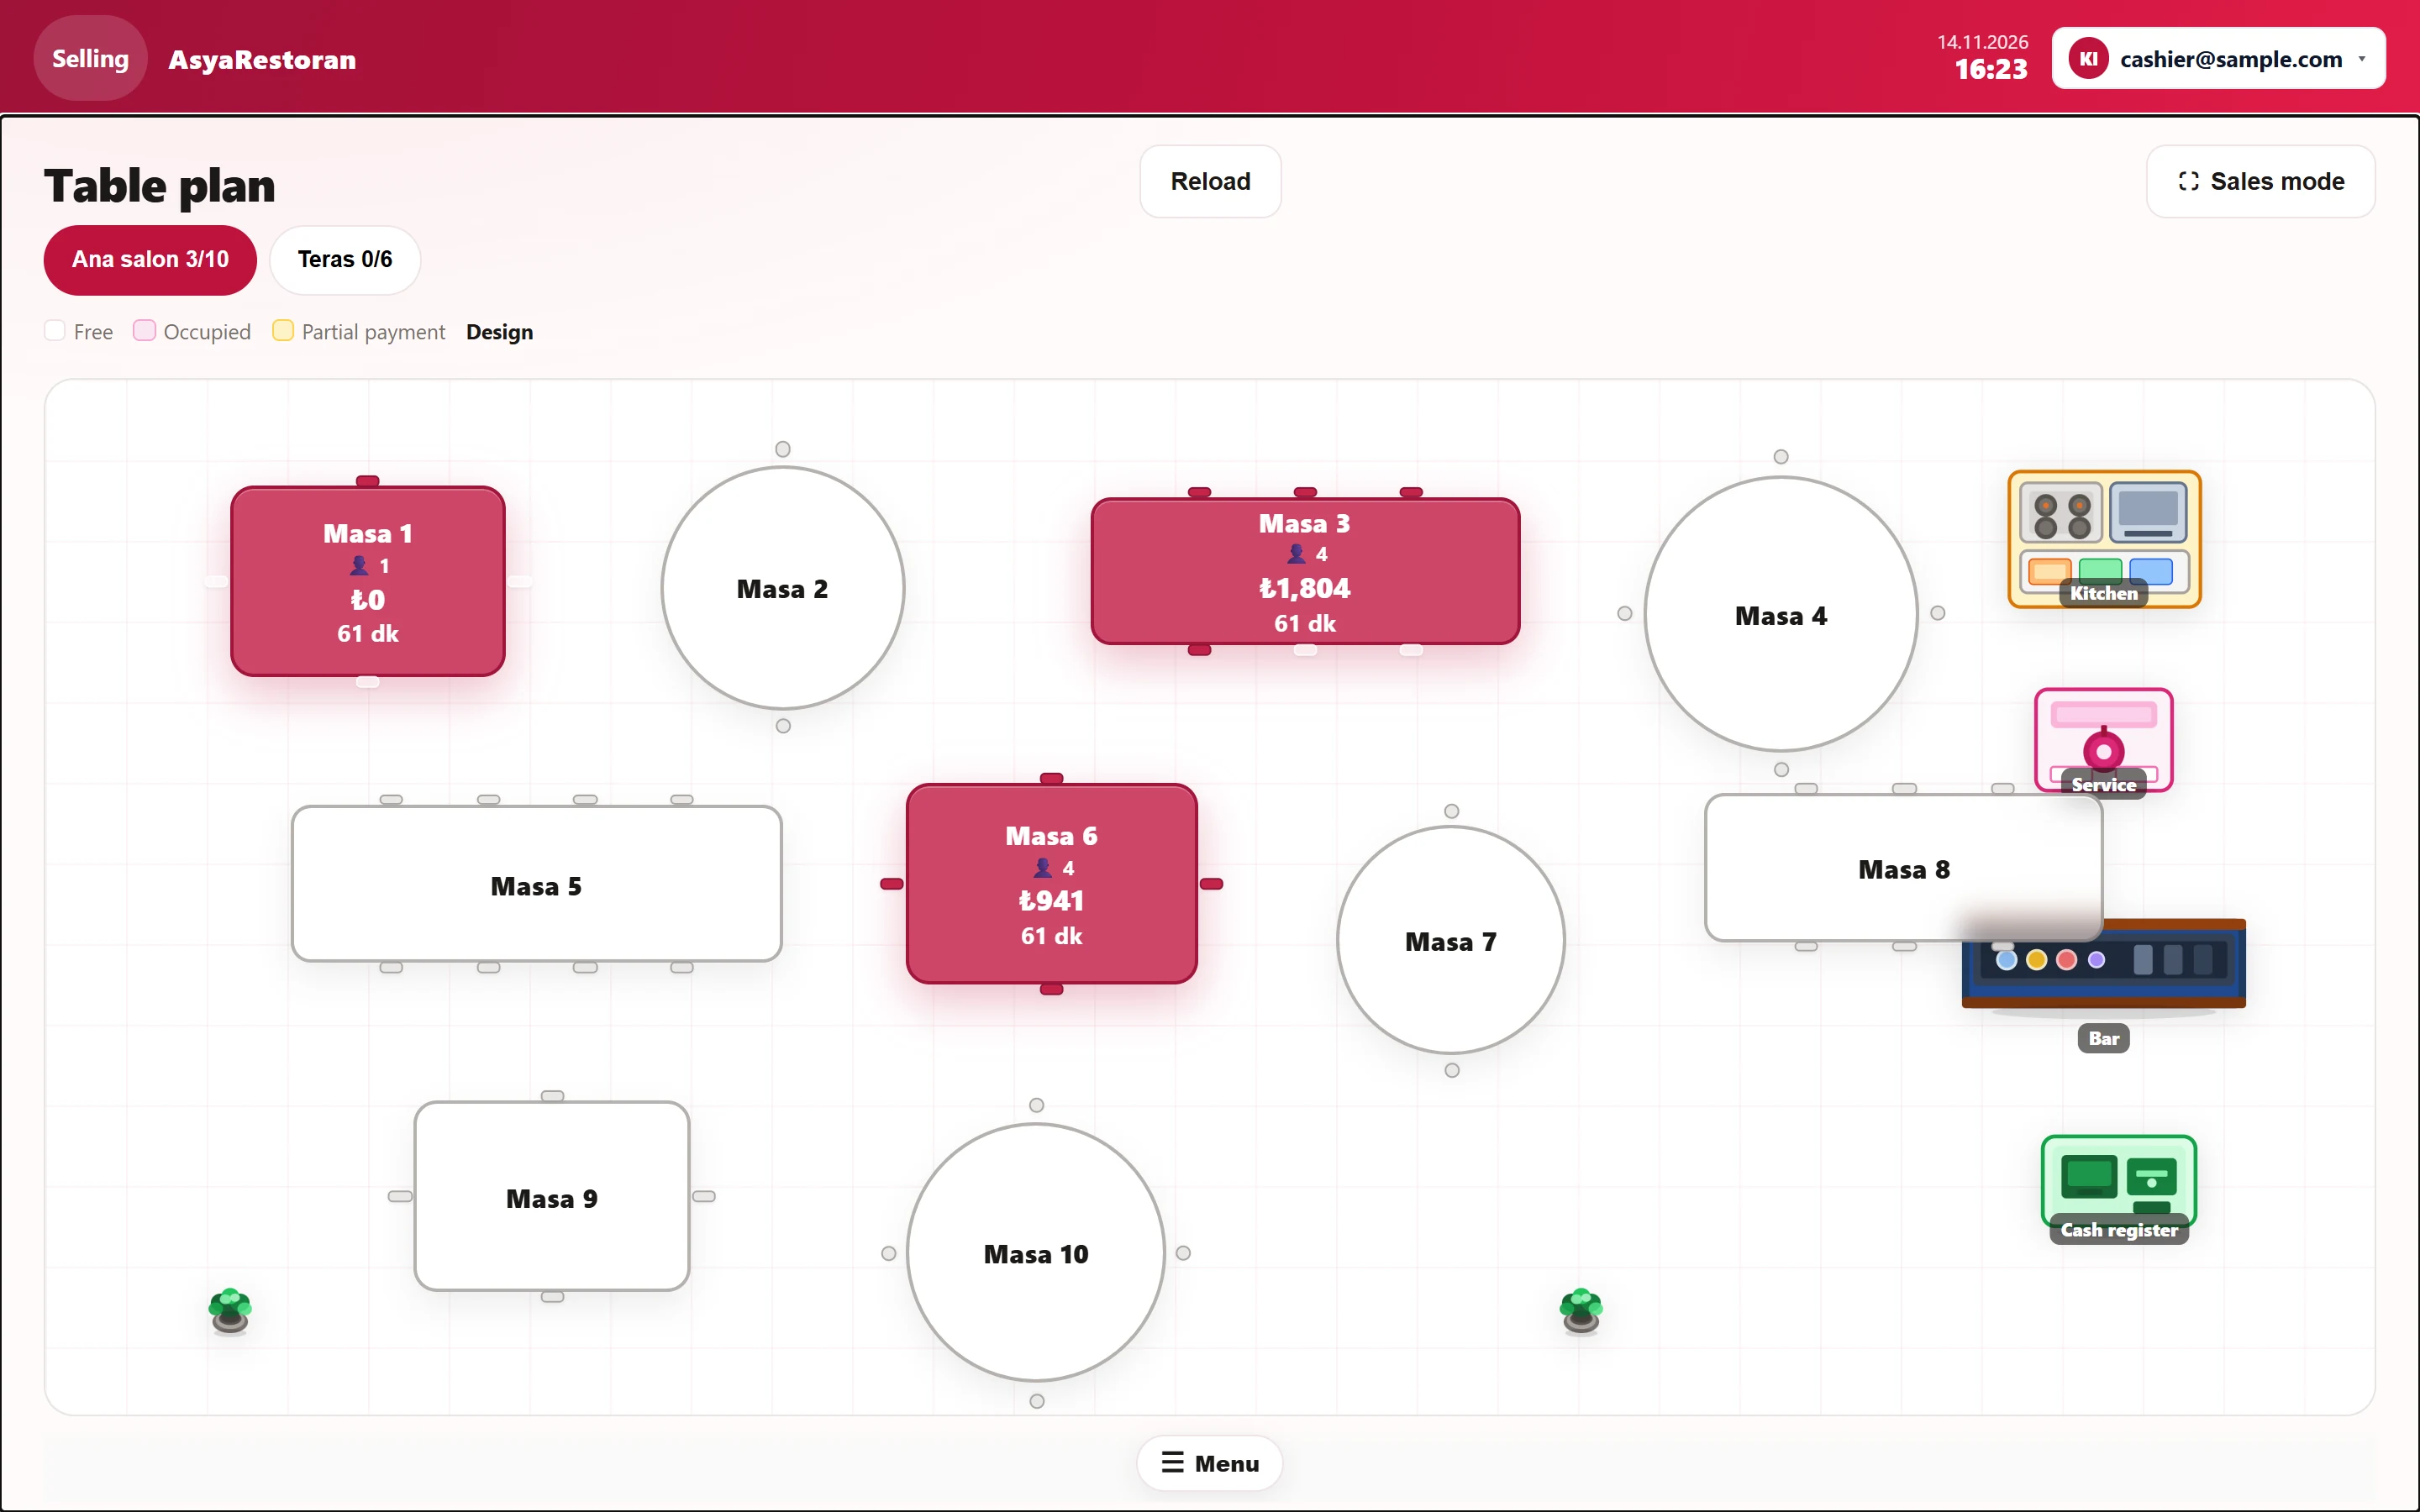
- 1Ana salon 3/10 Hall tab: occupied / total tables.
- 2Reload Refreshes the plan now (the screen also refreshes by itself).
- 3Free Colour legend: empty, occupied, partly paid.
- 4Design Current view (changed in the control panel).
- 5Masa 1 Occupied table: guests, amount and time open. Click to open the bill.
- 6Masa 2 Empty table: click to enter the number of guests and open a bill.
- 7Kitchen Decor (kitchen, bar, till…): shows the layout only.
- 8Open menu Bottom menu: switch to other sales screens.
The tabs at the top are the halls; the number on a tab is occupied / total tables. Colours: white Empty, pink Occupied, yellow Partial payment (a payment was taken but the bill is not closed).
View: flat list, classic squares, design
The table plan opens in one of three views. The view is a company-wide setting chosen on the Table plan view card of the Control panel:
- Flat list (default): rows with table, status, guests and amount.
- Classic squares: each table is a square button.
- Design: tables and decor are drawn as laid out in the hall; seats are shown by capacity.
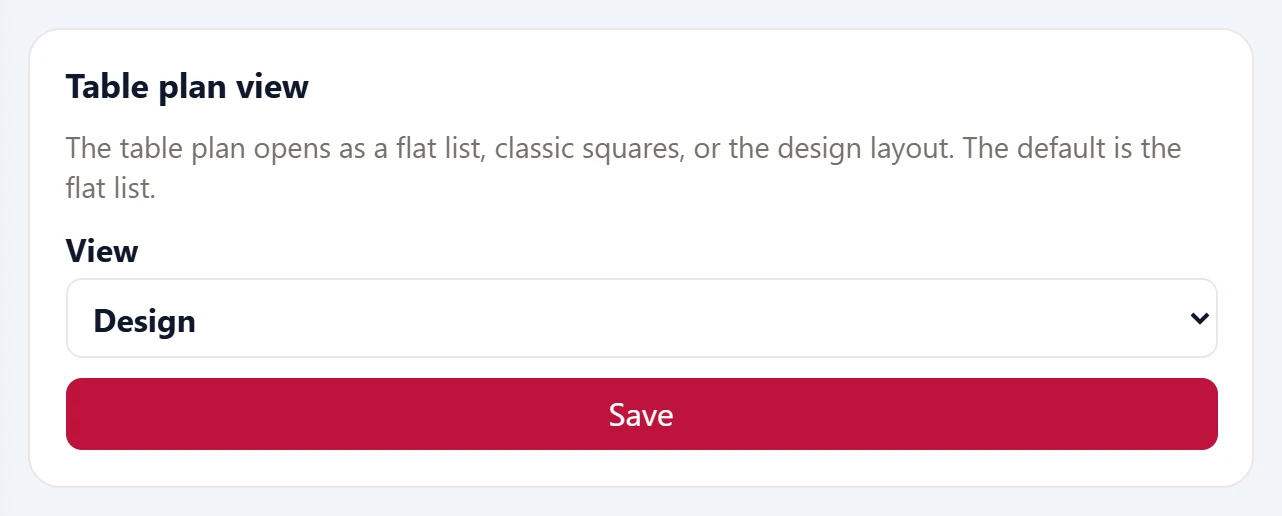
- 1Save Saves the selection.
| Field | Sign in | Description |
|---|---|---|
| View | Choice list | Flat list (default), classic squares or design layout. Applies to all devices of the company. Options: Flat list · Classic squares · Design |
Opening a bill
- Tap an empty table.
- In the Number of people window type the number or pick a quick key.
- Press Open bill; the bill screen opens.
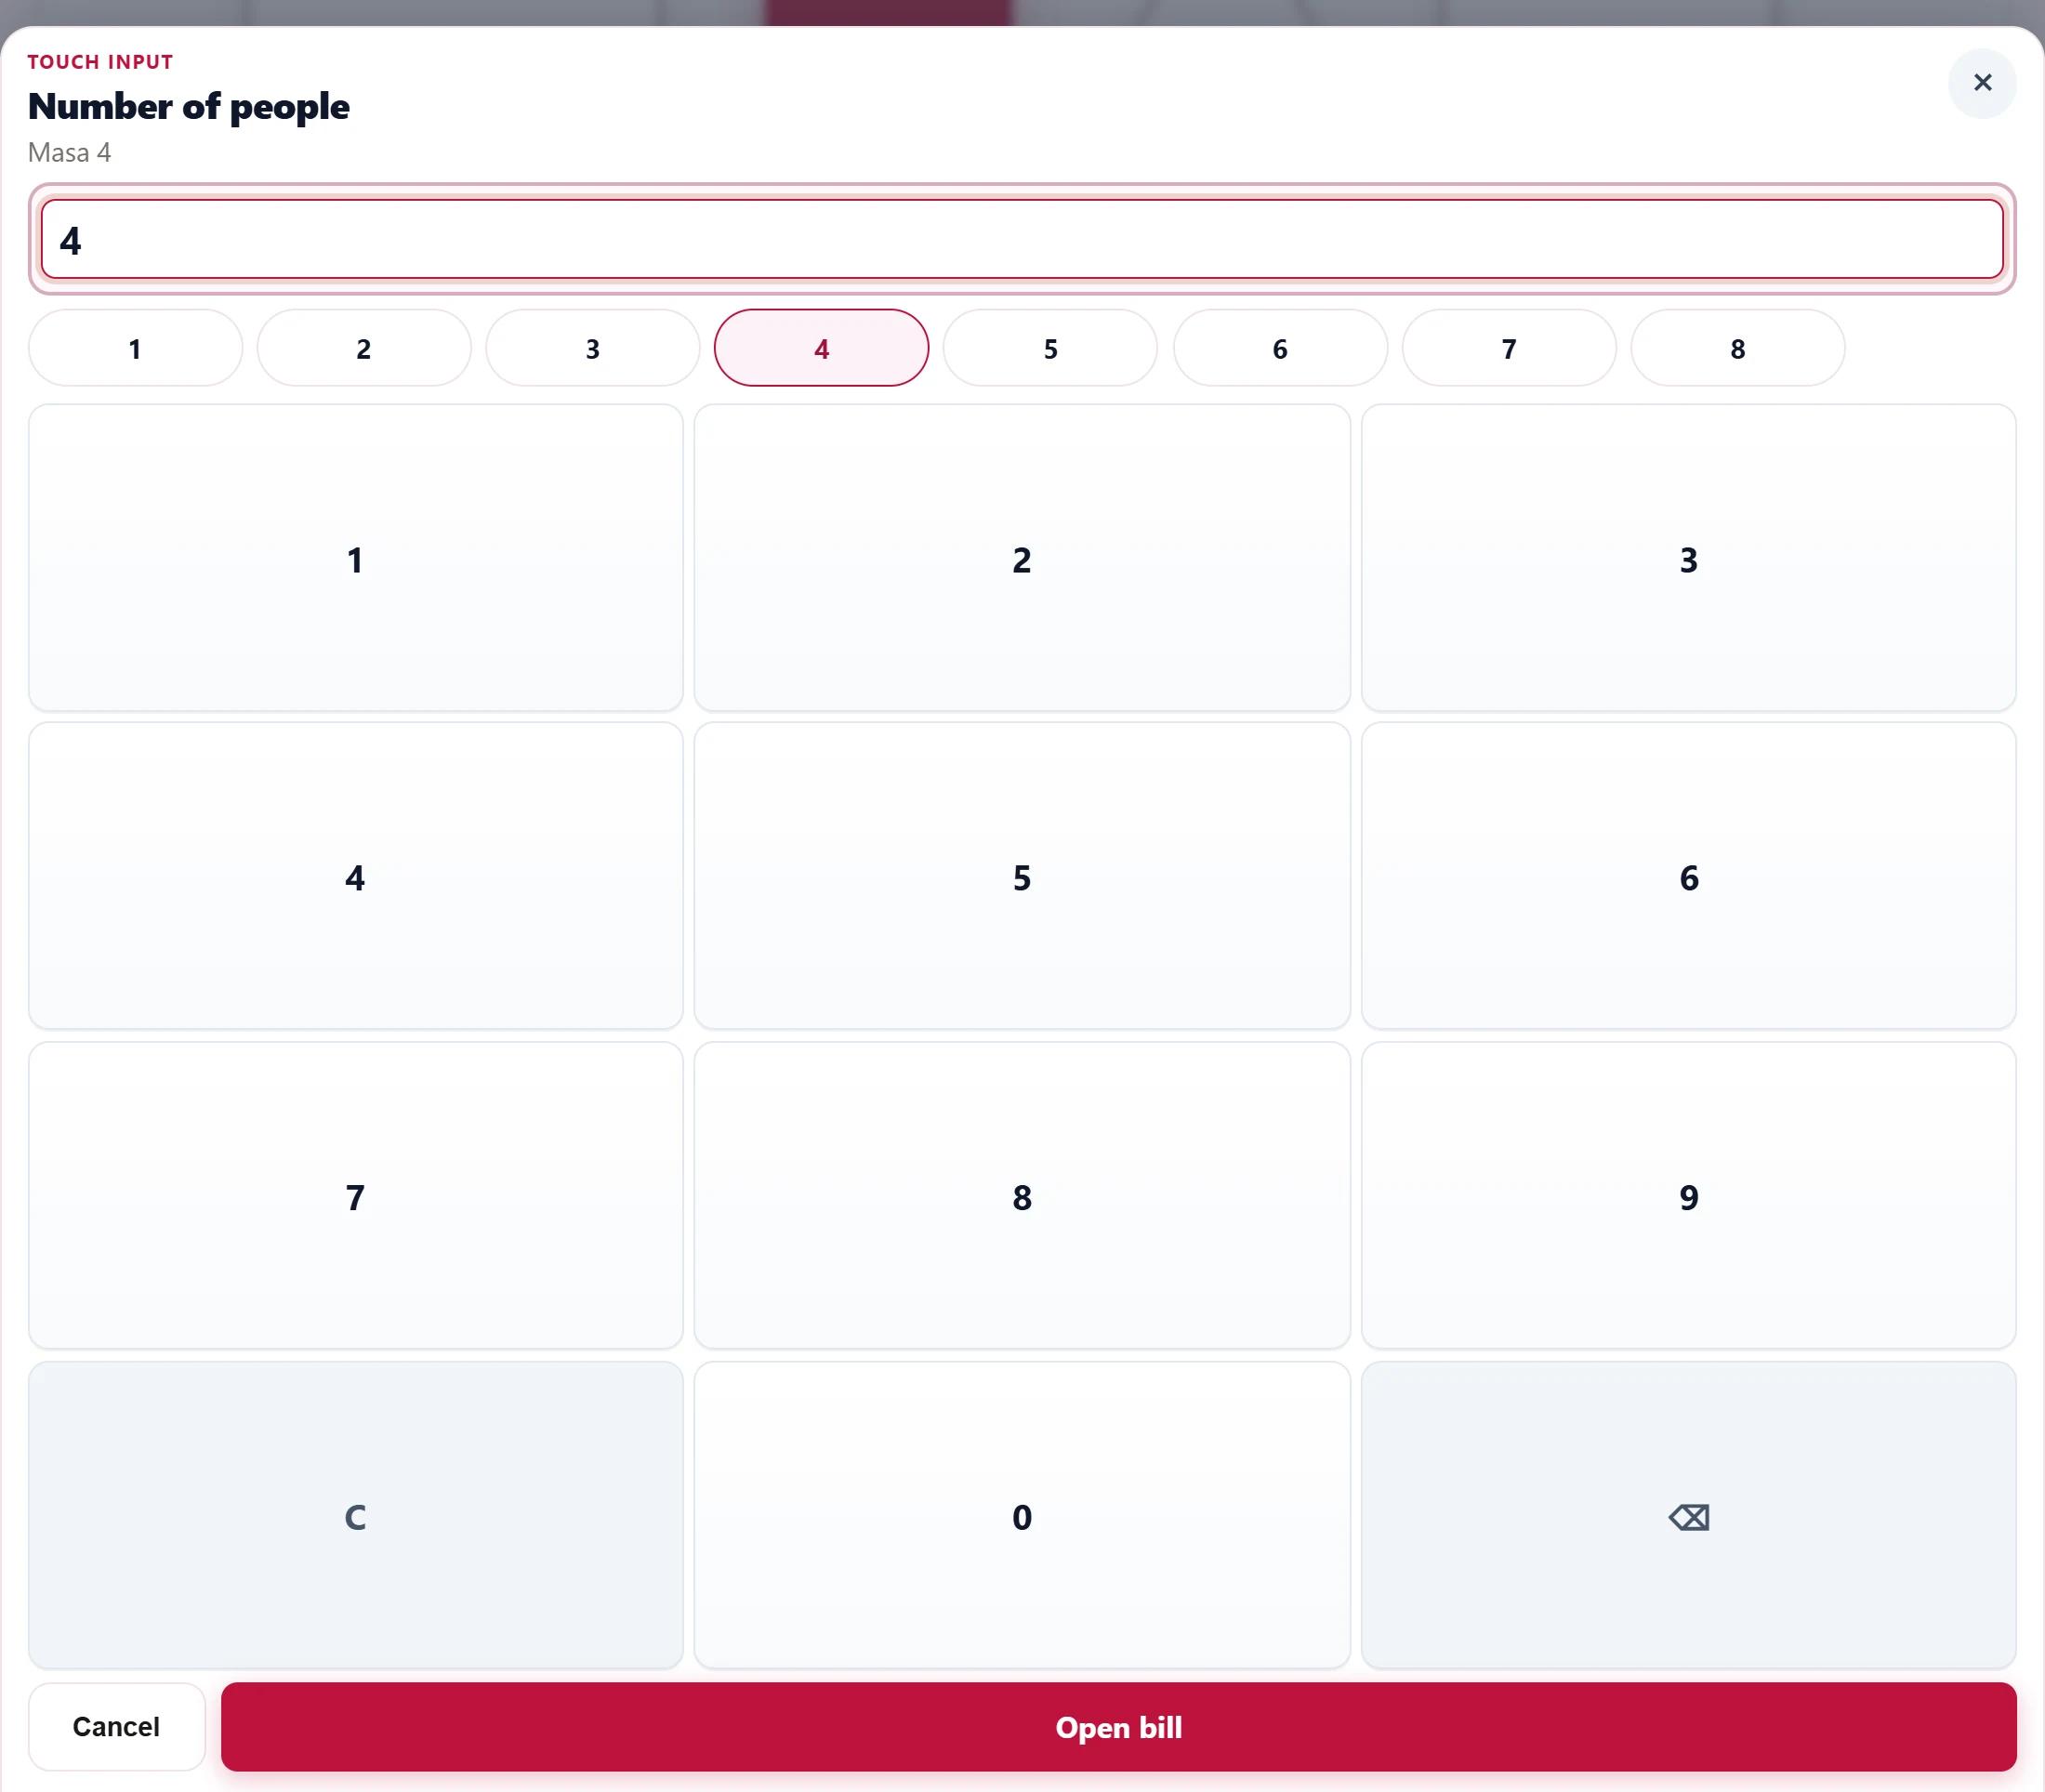
- 1Number of people Number of guests; can also be typed on the touch keys.
- 2Quick select Quick number keys (1–8).
- 3Open bill Opens the bill and goes to the bill screen.
Table actions: change, merge, split
Right-click a table (press and hold on a touch screen). On an occupied table these actions appear:
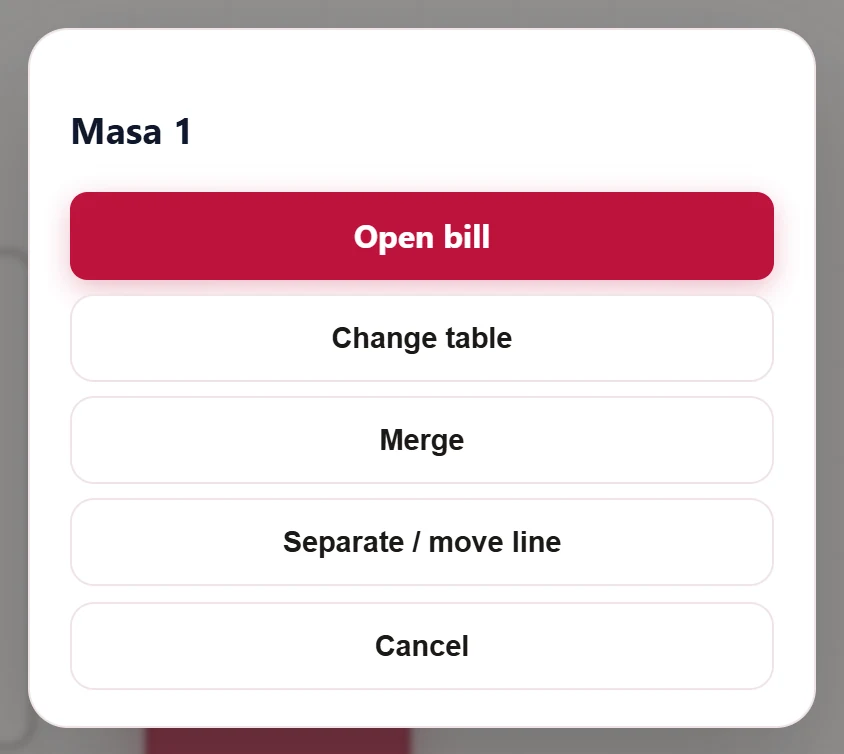
- 1Open bill Opens the table's bill.
- 2Change table Moves the bill to an empty table.
- 3Merge Merges the bill with the bill of another occupied table.
- 4Separate / move line Moves the selected lines to another table (splitting the bill).
- 5Cancel Closes the window.
- Change table: the bill moves to an empty table (only empty tables are listed).
- Merge: the bill is merged with the bill of another occupied table (only occupied tables are listed).
- Separate / move line: the lines you choose move to another table; use it to split the bill between tables.
On an empty table only Open bill appears.
Bottom menu
The Menu button at the bottom opens a bar for switching to the other sales screens.

- 1Selling Sales home screen.
- 2Self-service Self-service.
- 3Package Takeaway service.
- 4Open Open bills.
- 5Closed Closed bills.
- 6Edit plan Edits the table and decor layout (design view only).
- 7Bill by name Bill by name, not tied to a table (self-service screen).
- 8Settings Table definitions.
Editing the plan (design view)
In design view, Edit plan in the bottom menu switches to layout editing.
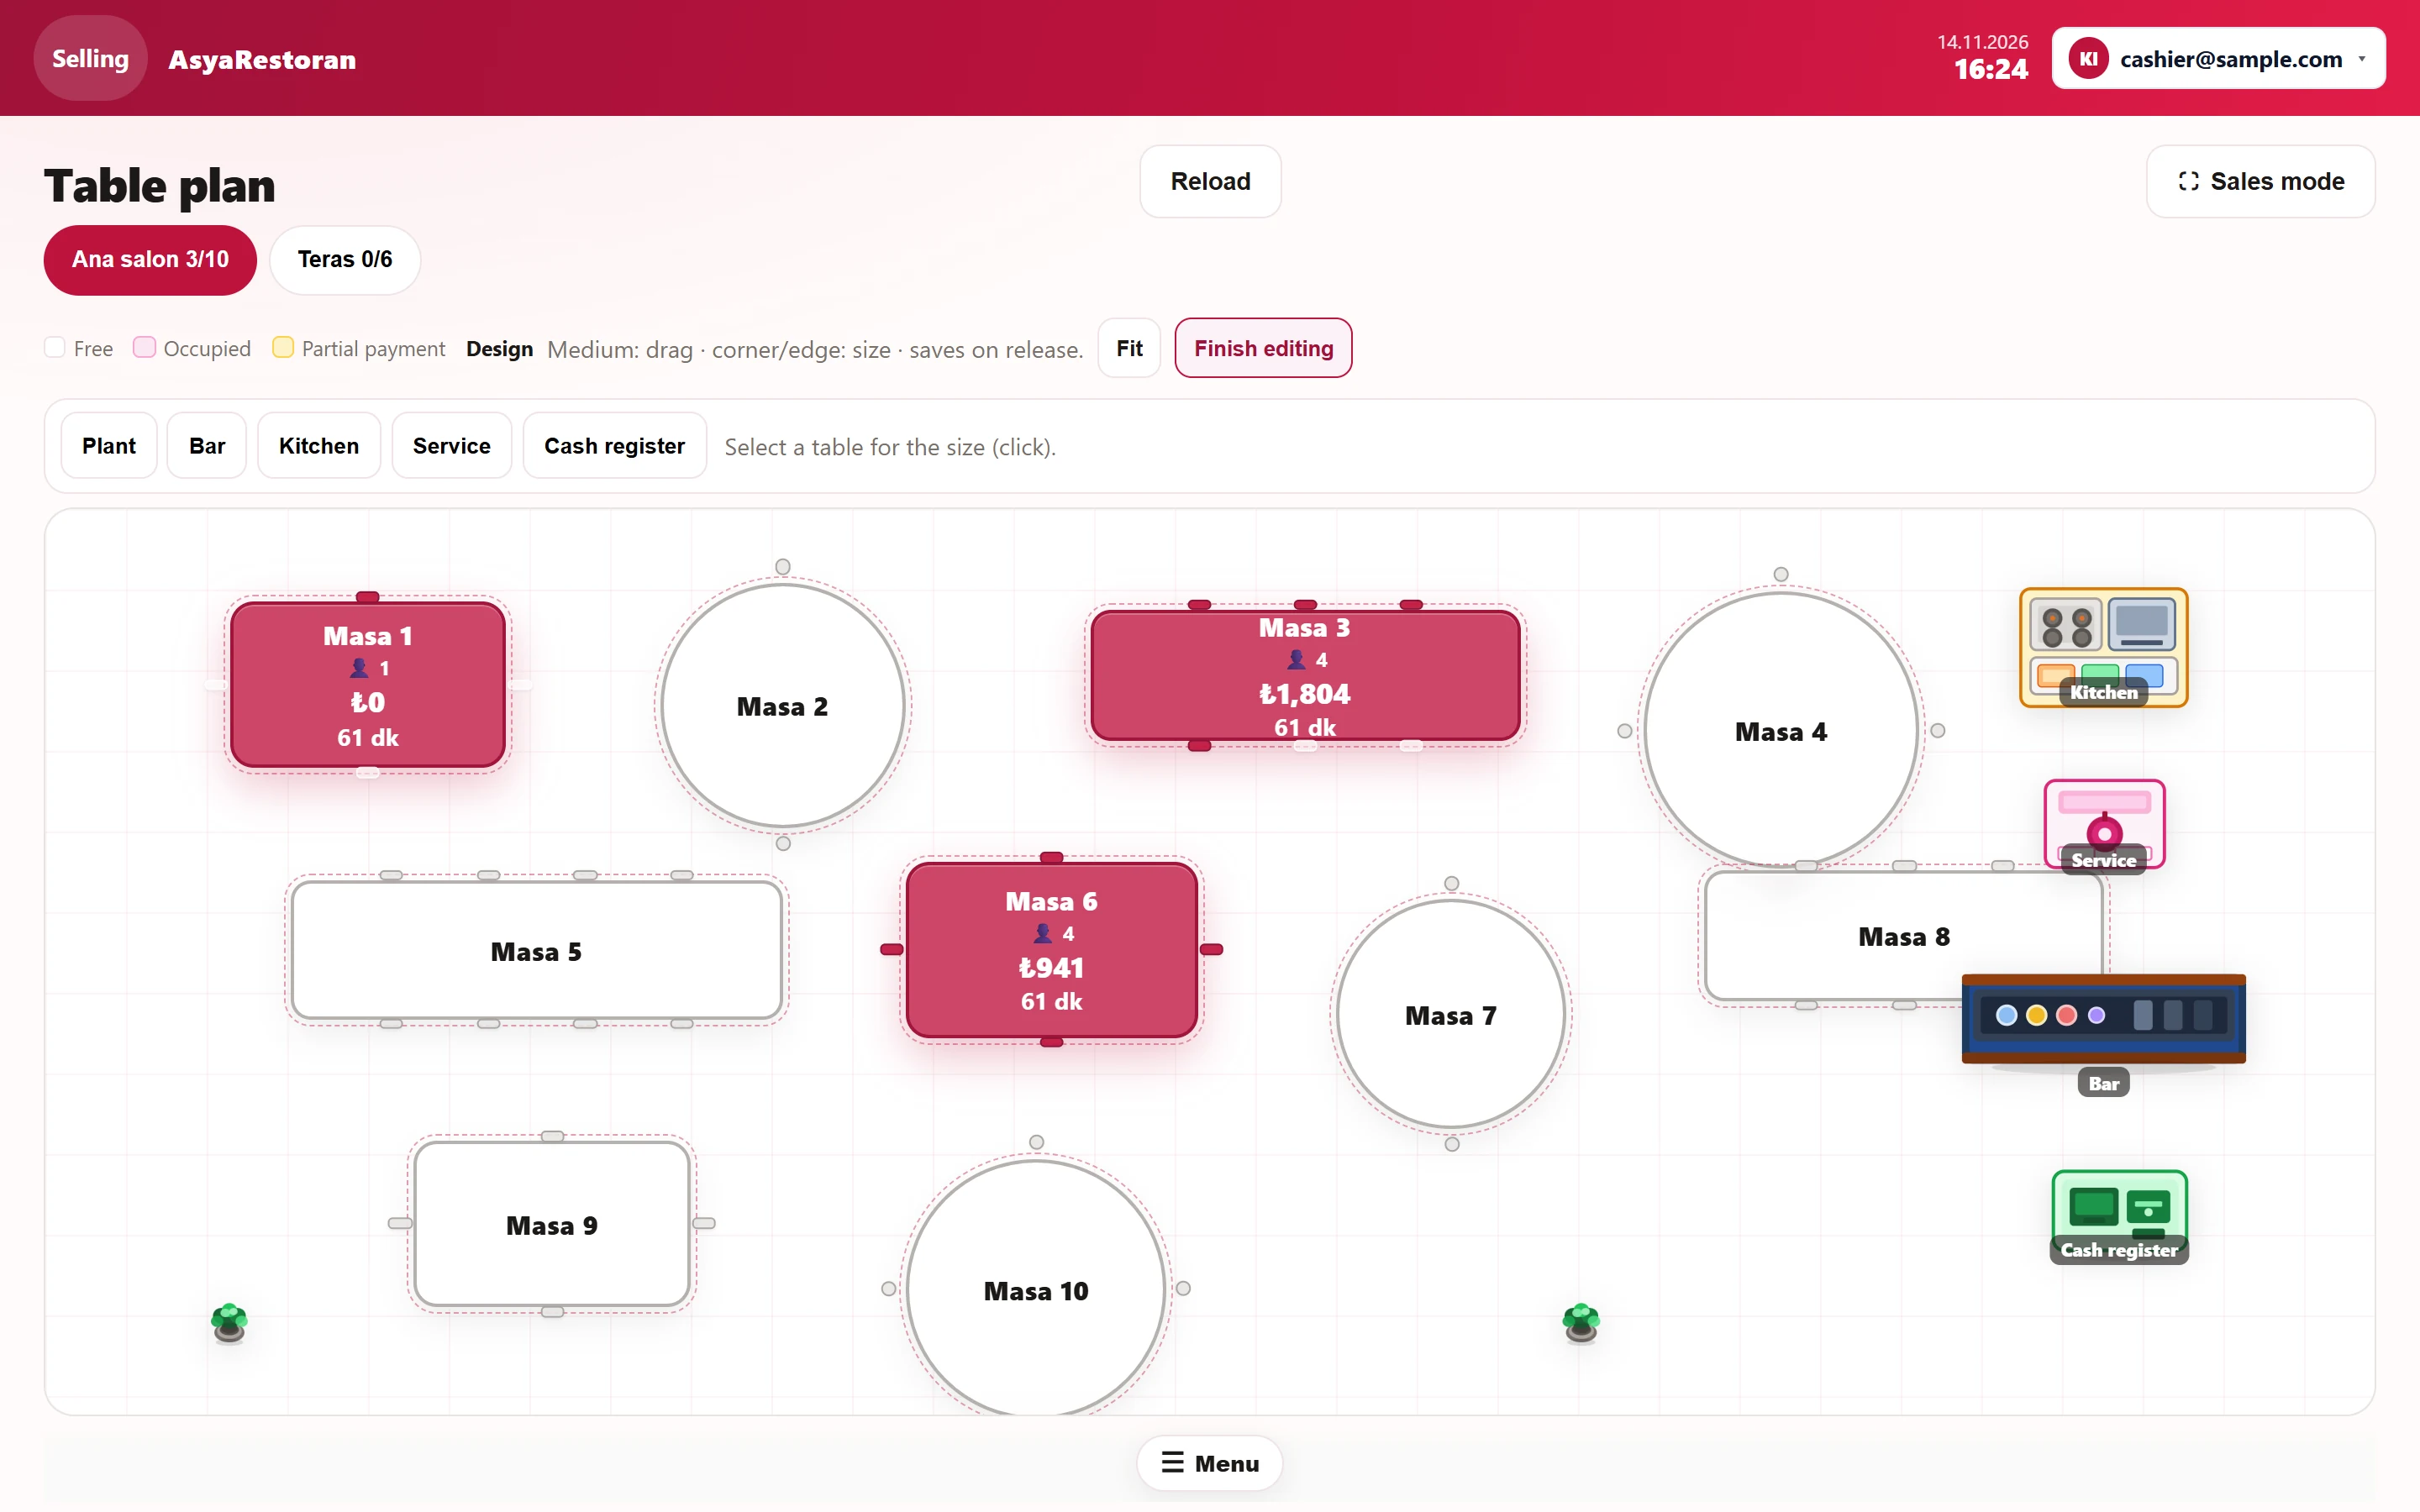
- 1Decoration Adds decor: plant, bar, kitchen, service, till.
- 2Fit Fits all tables and decor into the plan.
- 3Finish editing Finishes editing.
- 4Masa 1 Drag from the middle to move; drag an edge / corner to resize. Saved on release.
- Drag a table from the middle to move it; drag an edge or corner to resize. The position is saved on release.
- Click a table to show the X, Y, W, H boxes; type values and press Apply for an exact position.
- Add decor with the plant, bar, kitchen, service and till buttons. To delete decor, right-click it and choose Delete.
- Fit fits all tables and decor into the plan.
- Leave with Finish editing.
Table code, name, capacity and shape can also be edited under Definitions → Tables; the plan position is shown there as numbers.
Common warnings
| Warning | Cause | Solution |
|---|---|---|
| This hall has no tables. | No tables are defined for the selected hall. | Add tables under Definitions → Tables. |
| This feature is not enabled in your package. | Table sales are disabled for the company. | Have table sales enabled in the company features. |